ECN Lab 4: Setting up a Wazuh SIEM, then investigating Windows, Linux and Suricata alerts.

INTRODUCTION
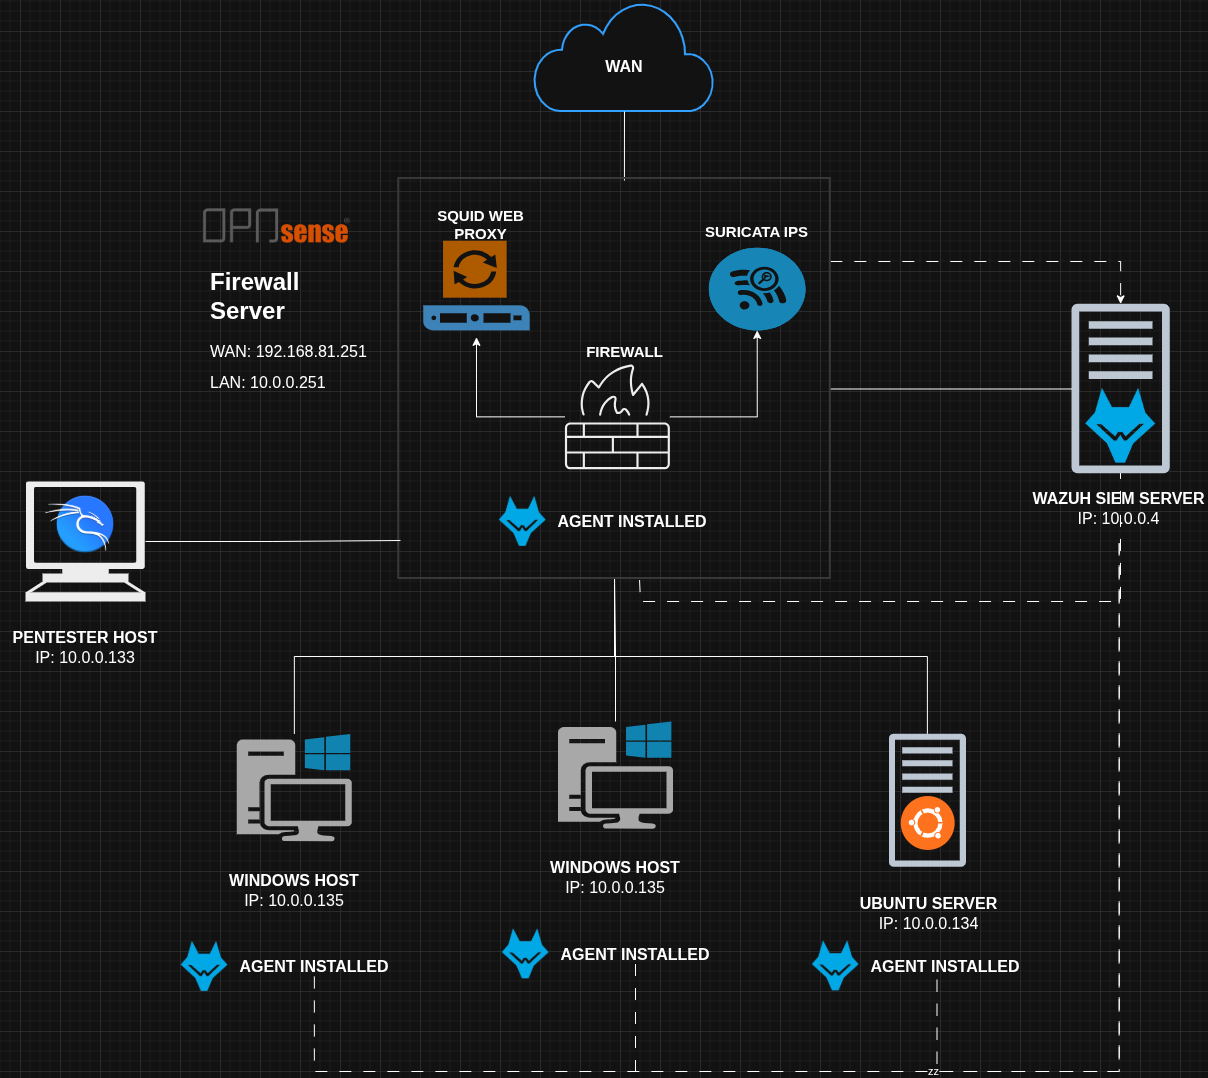
SCENARIO: We are appointed as security engineer to secure a virtual company named “samyak.org”. Currently there have 50+ employees in the company and there are no security measures, no network management, no AD, nothing just all connected to a LAN.
Welcome to the fourth installment in my “Enterprise Cyber Security and Networking Lab” (ECN Lab) series.
So far we had:
- Isolated the WAN network from Clients using a firewall server and a switch.
- Designed a HA firewall fail-over architecture (for the sake on simplification I will remove that from here).
- Designed a multi WAN fail-over and load balancing architecture,
Now, the owner of samyak.org had told they plan to establish a SOC team on the premises.
We will setup a Wazuh SIEM server and install wazuh agents on the client devices. Including both windows and Linux machines.
Lastly I will add a wazuh agent on Opnsense Firewall to see the Intrusion detection logs.
SOME CHANGES FOR HOME LAB
(If someone is following me along)
I had been using virtual-box for the past 2 setups:
- firewall HA setup
- Multi WAN failover setup
Reason was that in firewall HA setup, vmware workstation’s anti-MAC spoofing security was messing with the virtual IP’s functioning.
But now for SOC lab I might have to run 6 - 7 VMs together. Personally, I consider VMware more performant and a more familiar software.
So, I will switch to VMware from now on.
And for the sake of performance, I would remove the HA or multi-WAN architecture.
NETWORK
| LAB network | vmware network | IP range | DHCP |
| LAN | custom network | 10.0.0.0/24 | disabled |
| WAN | NAT network | 192.168.81.0/24 | enabled |
SOME MACHINES TO SETUP
We will need:
- OpnSense Firewall (10.0.0.251)
- Ubuntu Server (10.0.0.134)
- Windows 10 pro (10.0.0.135)
- Wazuh VM (Cent OS) (10.0.0.4)
- Kali linux (10.0.0.133)
Turn off VM which are not required in testing a particular feature
WAZUH SERVER SETUP
NOTE: Wazuh has three components:
- Wazuh Server
- Wazuh Indexer
- Wazuh dashboard
All these can be deployed across multi-node cluster configuration. Great for large enterprise environments.
But, for less than 100 endpoints there is an all in one deployment. See here
Install the wazuh VM, documentation says it needs 8 GB memory and 4 cores, for lab 4 gb ram and 2 cores worked fine.
just connect it to our internal network (LAN network: 10.0.0.0/24)
Use the credentials wazuh-user:wazuh 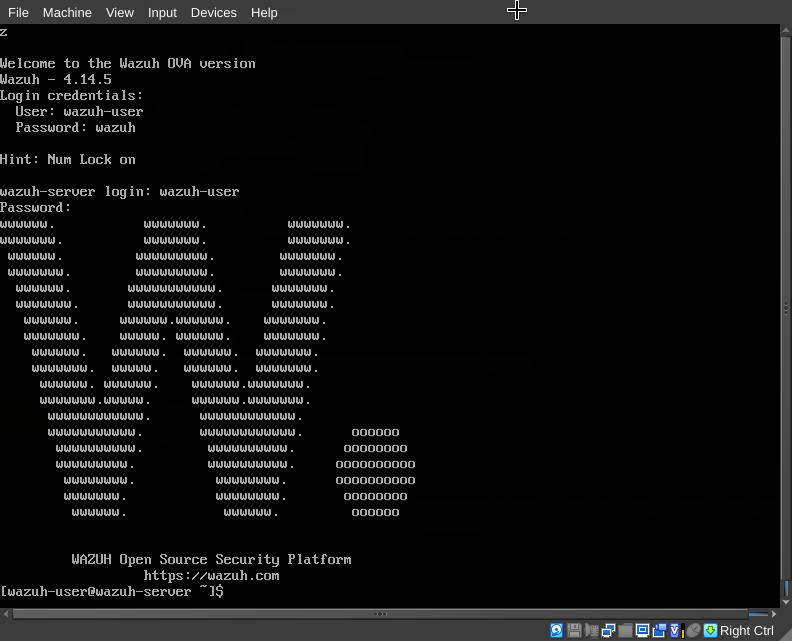
Now we need this VM to use static IPv4 say 10.0.0.8/24 . Problem is it’s preconfigured to use DHCP, and not have nmcli installed.
We will need to edit the configuration file directly
1
sudo vim /etc/sysconfig/network-scripts/ifcfg-<interface_name>
Use ifconfig to see the LAN interface name
1
2
3
4
5
6
7
8
9
10
11
DEVICE=eth0
TYPE=Ethernet
ONBOOT=yes
BOOTPROTO=none
IPADDR=10.0.0.8
PREFIX=24
# or NETMASK=255.255.255.0
GATEWAY=10.0.0.254
DNS1=8.8.8.8
USERCTL=yes
PEERDNS=no            # Don't overwrite DNS via DHCP
remove this lines as we are not using DHCP.
1
2
3
4
DHCPV6C=yes
DHCPV6C_OPTIONS="-nw"
PERSISTENT_DHCLIENT=yes
RES_OPTIONS="timeout:2 attempts:5"
in /etc/resolv.conf add this line
1
nameserver 8.8.8.8
restart the network service
1
sudo systemctl restart network
do some checks:
1
2
ifconfig interface_name
ping -c 4 8.8.8.8
go to https://wazuh_vm_ip , use default creds admin:admin 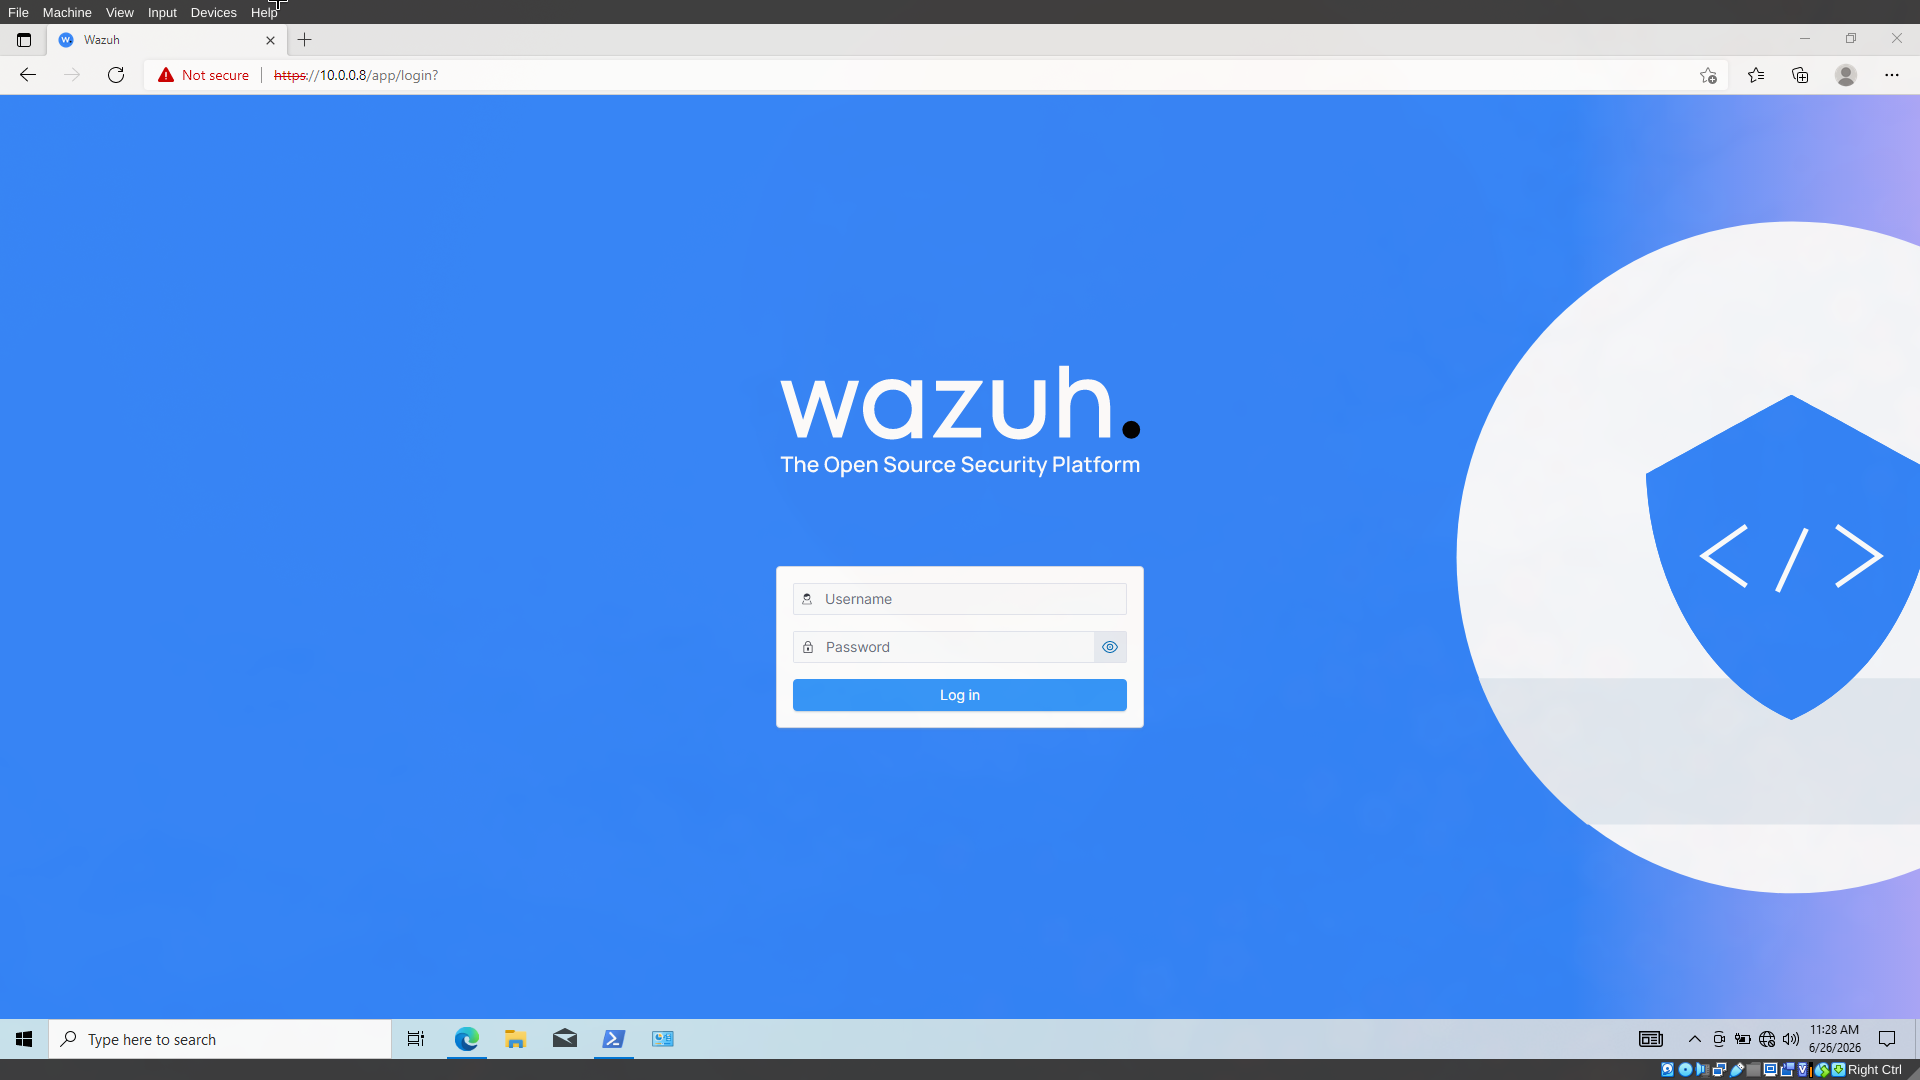
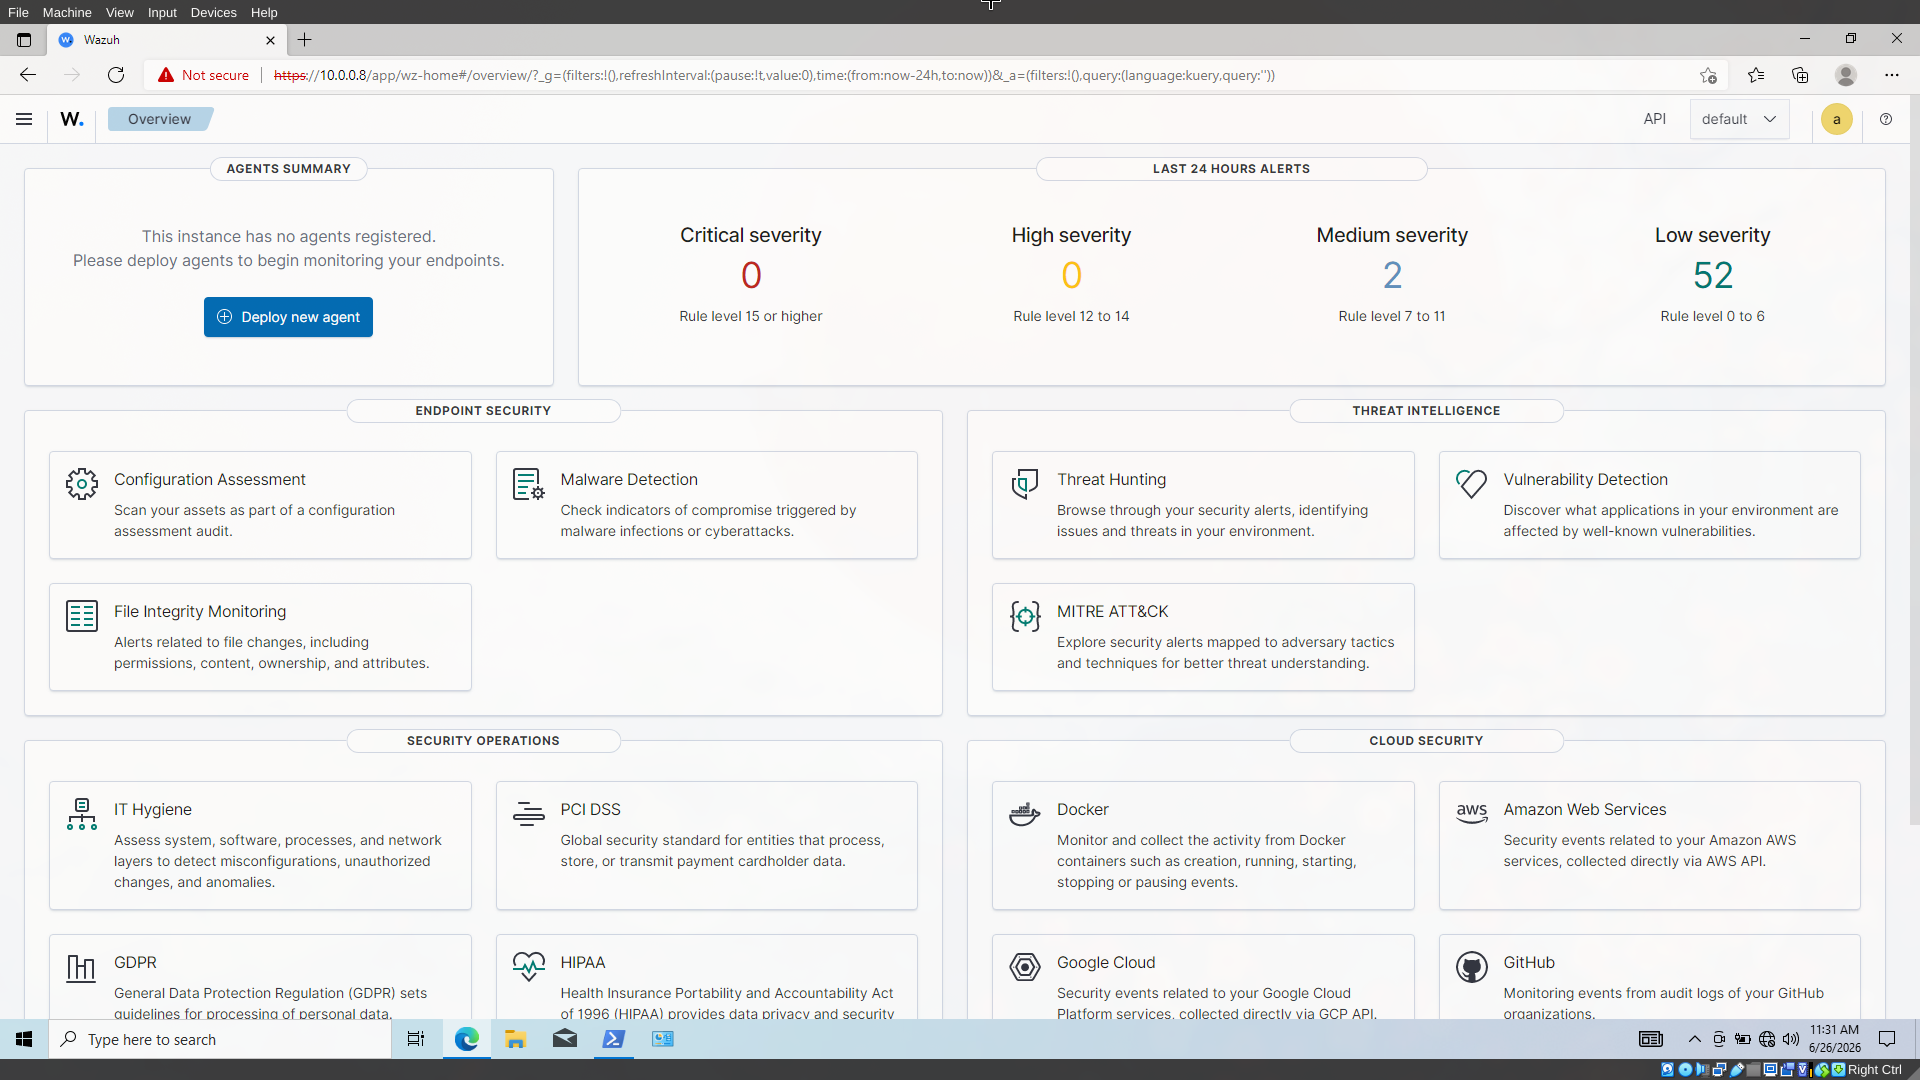
TIME DATE ISSUE
For me the timestamps of the logs were messed up, tuns out the wazuh server time was incorrect.
In my lab it was fixed by syncing with vmware.
1
2
3
4
5
6
7
8
9
10
[wazuh-user@wazuh-server ~]$ vmware-toolbox-cmd timesync enable
Enabled

[wazuh-user@wazuh-server ~]$ timedatectl
Local time: Sun 2026-06-28 00:32:26 IST
Universal time: Sat 2026-06-27 19:02:26 UTC
RTC time: Sat 2026-06-27 19:02:26
Time zone: Asia/Kolkata (IST, +0530)
System clock synchronized: yes
NTP service: active RTC in local TZ: no
DEPLOYING WAZUH AGENTS ON HOSTS
Go to Deploy new agent select the OS , Wazuh server IP (so the agent can connect to it).
WINDOWS
Download ISO from official Microsoft website and install, if you already haven’t
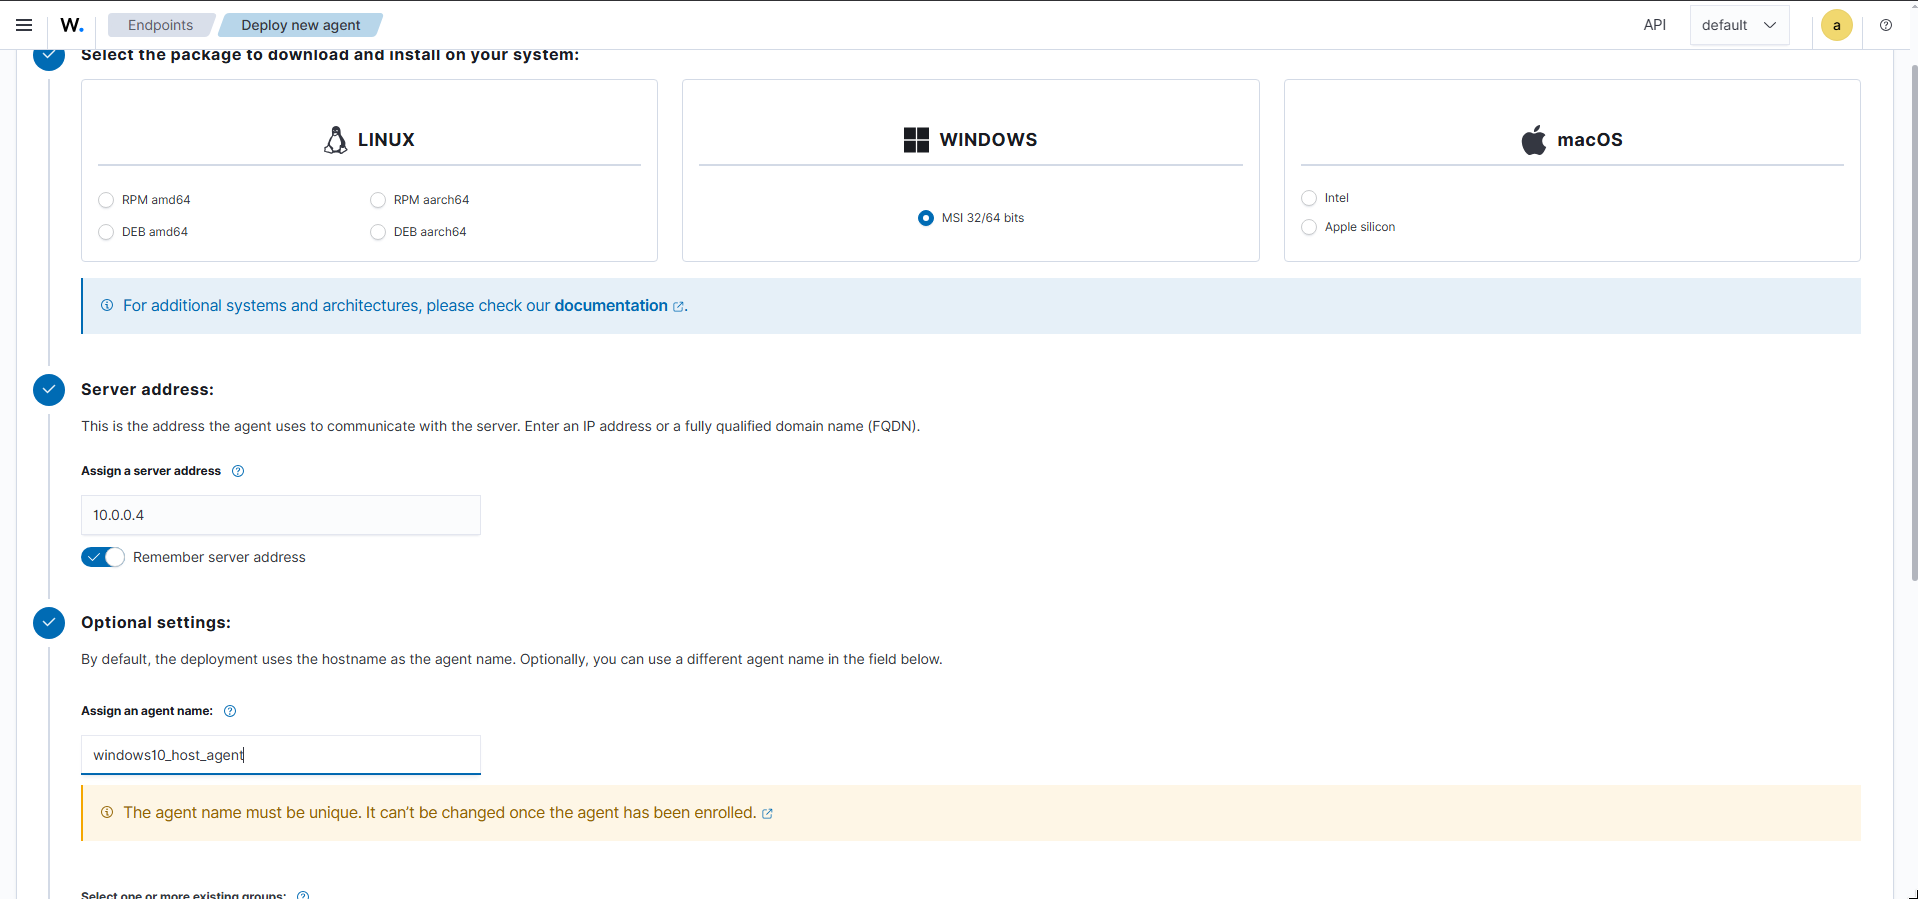
Administrator powershell:
1
2
3
Invoke-WebRequest -Uri https://packages.wazuh.com/4.x/windows/wazuh-agent-4.14.5-1.msi -OutFile $env:tmp\wazuh-agent; msiexec.exe /i $env:tmp\wazuh-agent /q WAZUH_MANAGER='10.0.0.4' WAZUH_AGENT_NAME='windows10_host_agent'

NET start Wazuh
Verify the service is runing 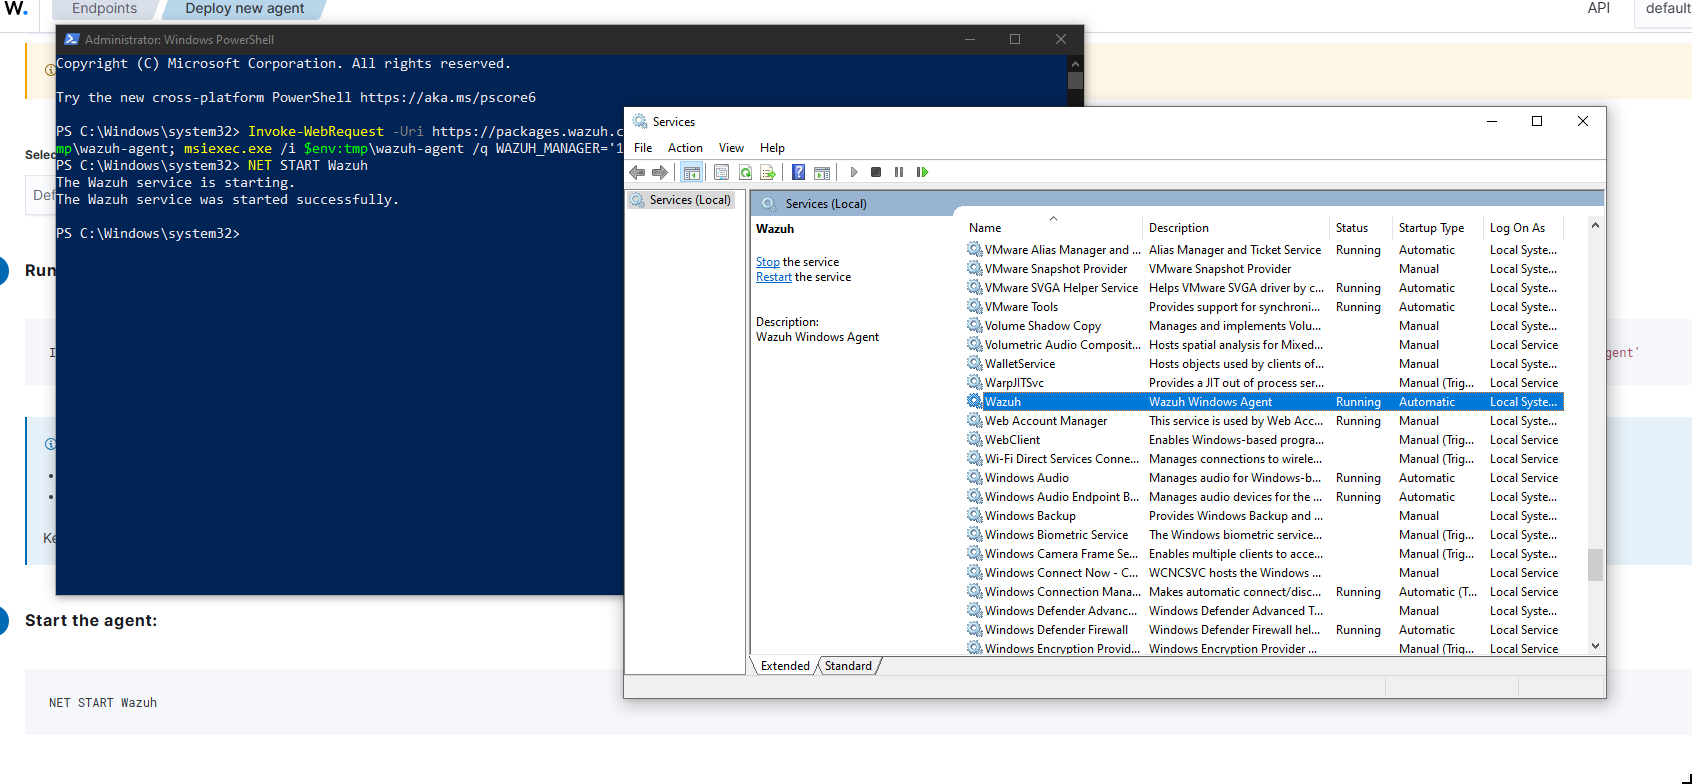
UBUNTU SERVER
Download the latest ISO and go through the installation:
- Enable SSH for remote access.
- give at-least 2 GB ram.
- Connect to LAN network
- Update the server.
Assign a static IP:
find a file like /etc/netplan/00-installer-config.yaml:
1
2
3
4
5
6
7
8
9
10
11
12
13
14
network:
  version: 2
  ethernets:
    ens33:
      dhcp4: false
      addresses:
        - 10.0.0.134/24
      routes:
        - to: default
          via: 10.0.0.251
      nameservers:
        addresses:
          - 8.8.8.8
          - 1.1.1.1
1
2
3
4
sudo netplan try # accept the configurations if okay
# test
ip a s
ip r
SSH from windows host to Ubuntu server:
1
ssh user1@10.0.0.134
Adding the web proxy certificate for HTTPS
download .crt on windows, and use SCP to transfer it to linux:
1
scp OPNsense-webCA.crt user1@10.0.0.134:/home/user1
install it on ubuntu server:
1
2
sudo cp OPNsense-webCA.crt /usr/local/share/ca-certificates/OPNsense-webCA.crt
sudo update-ca-certificates
Enter the generated command, for my case:
1
wget https://packages.wazuh.com/4.x/apt/pool/main/w/wazuh-agent/wazuh-agent_4.14.5-1_amd64.deb && sudo WAZUH_MANAGER='10.0.0.4' WAZUH_AGENT_NAME='ubuntu_server_agent' dpkg -i ./wazuh-agent_4.14.5-1_amd64.deb
If you still encounter any errors, check here
See that the daemons are running: 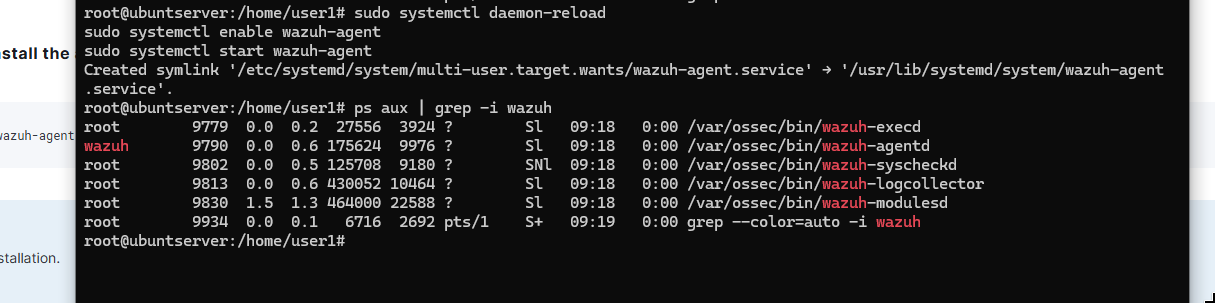
VERIFYING DEPLOYMENT
Both are agents on active: 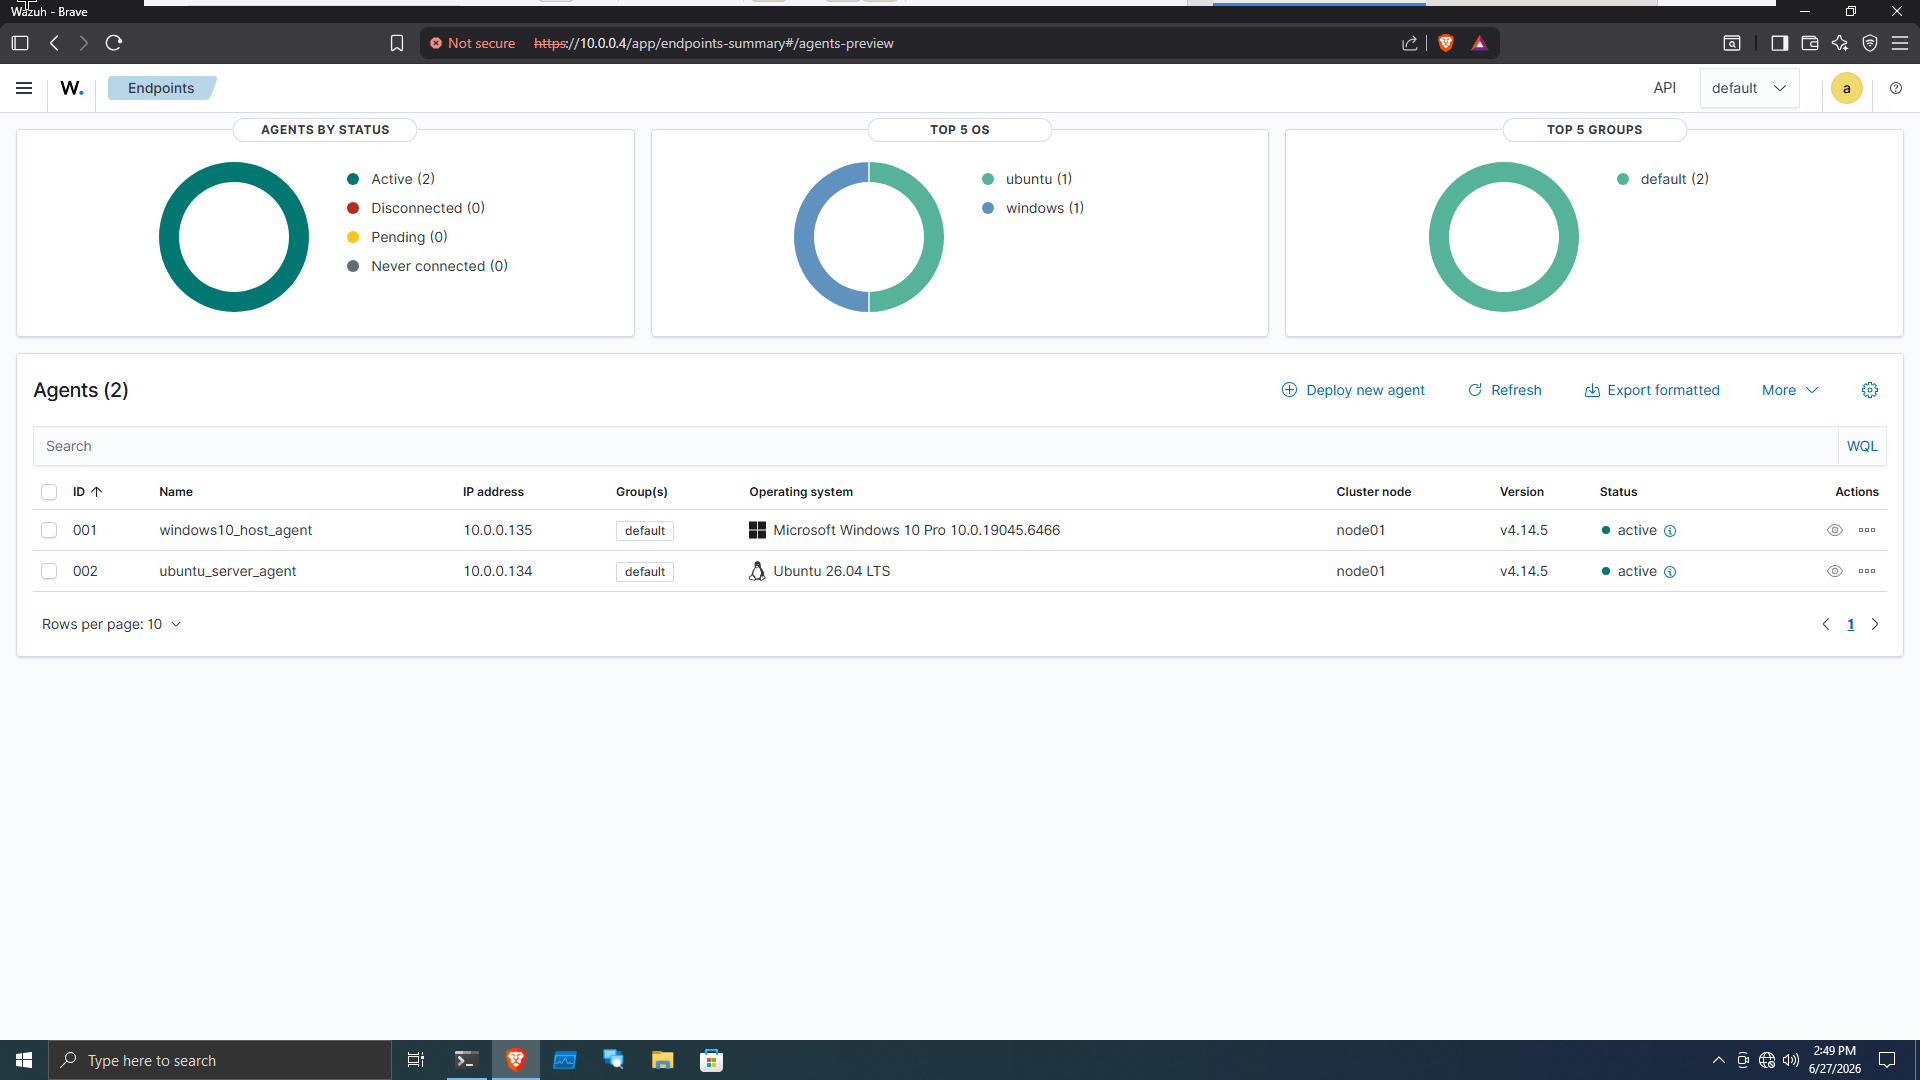
EXPLORING WAZUH
If wazuh finds any system vulnerability or compliance issues it shows them. 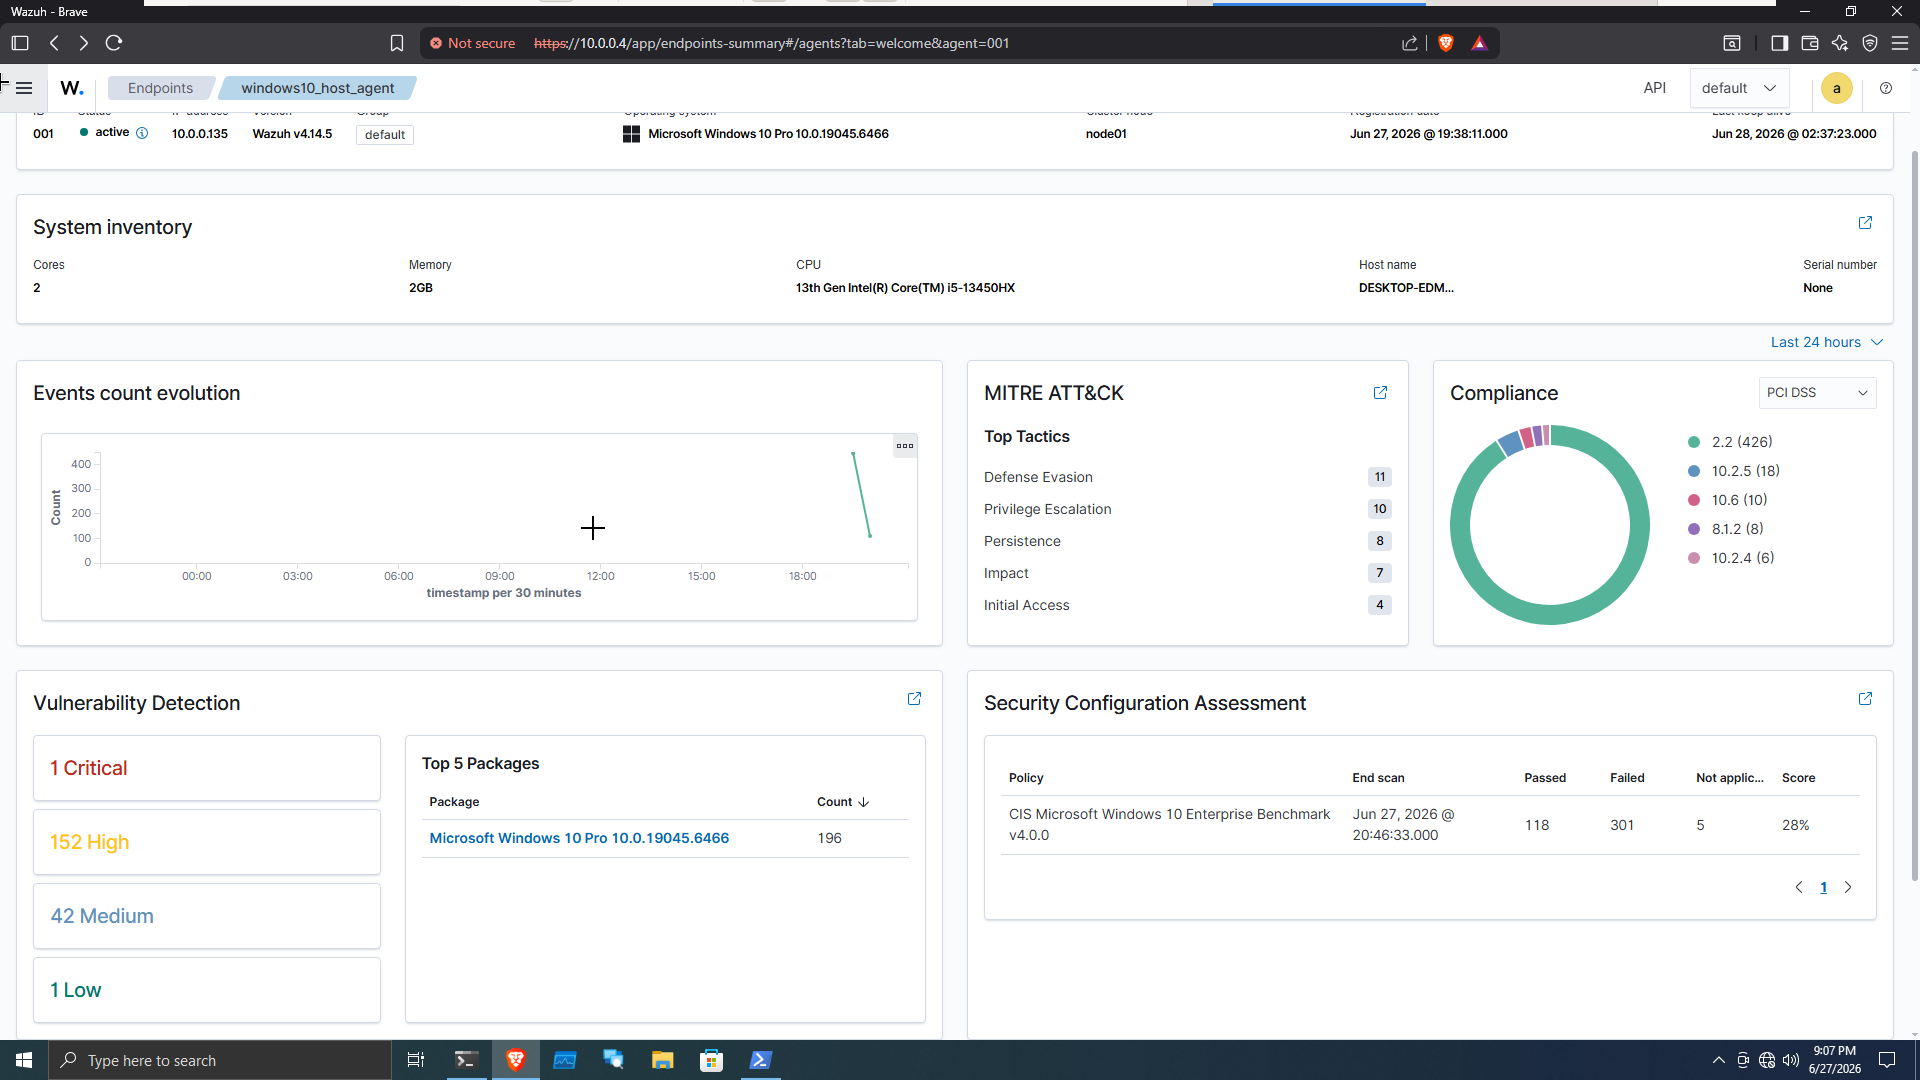
As, I am using am old version of windows 10 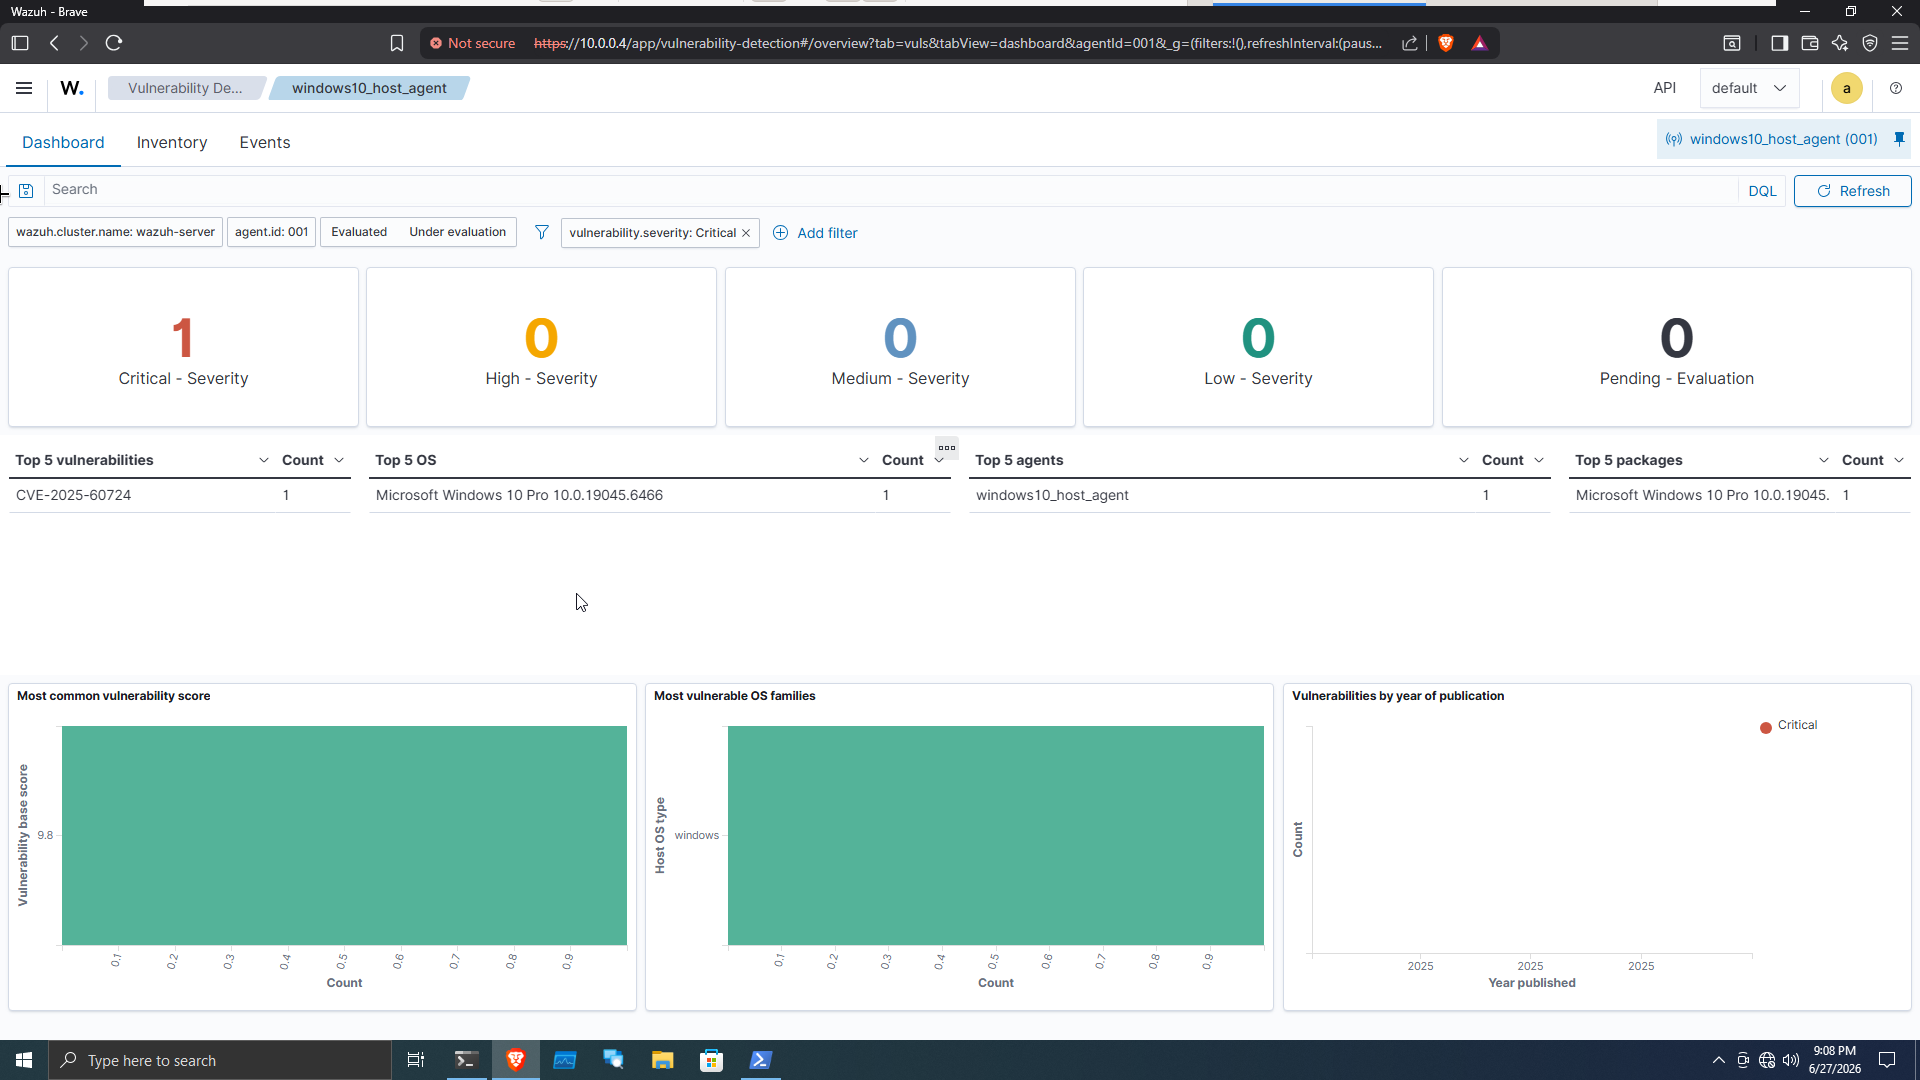
RULES
All the out-of-the-box rules are placed in /var/ossec/ruleset. Read more about them here.
1
2
3
4
5
6
7
8
9
/var/ossec/
        ├─ etc/
        │   ├─ decoders/
        |   |        └─ local_decoder.xml
        │   └─ rules/
        |         └─ local_rules.xml
        └─ ruleset/
                ├─ decoders/
                └─ rules/
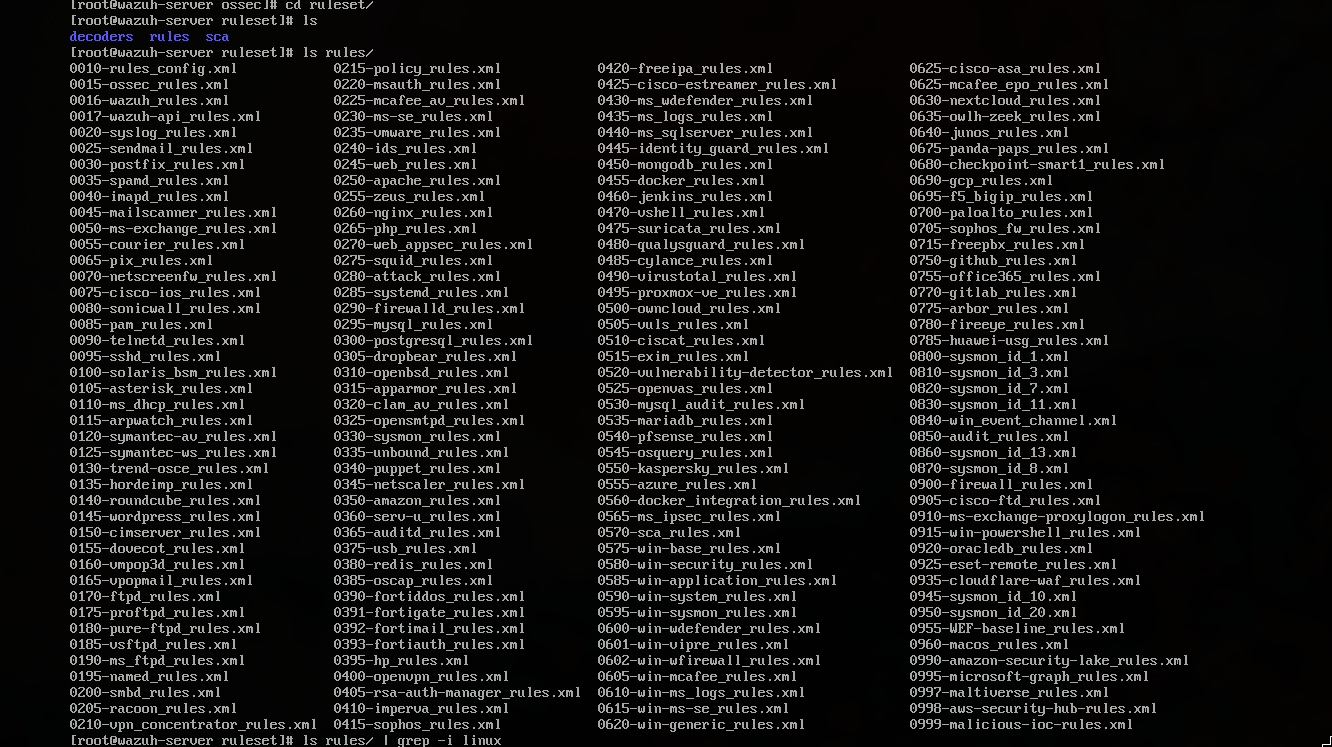
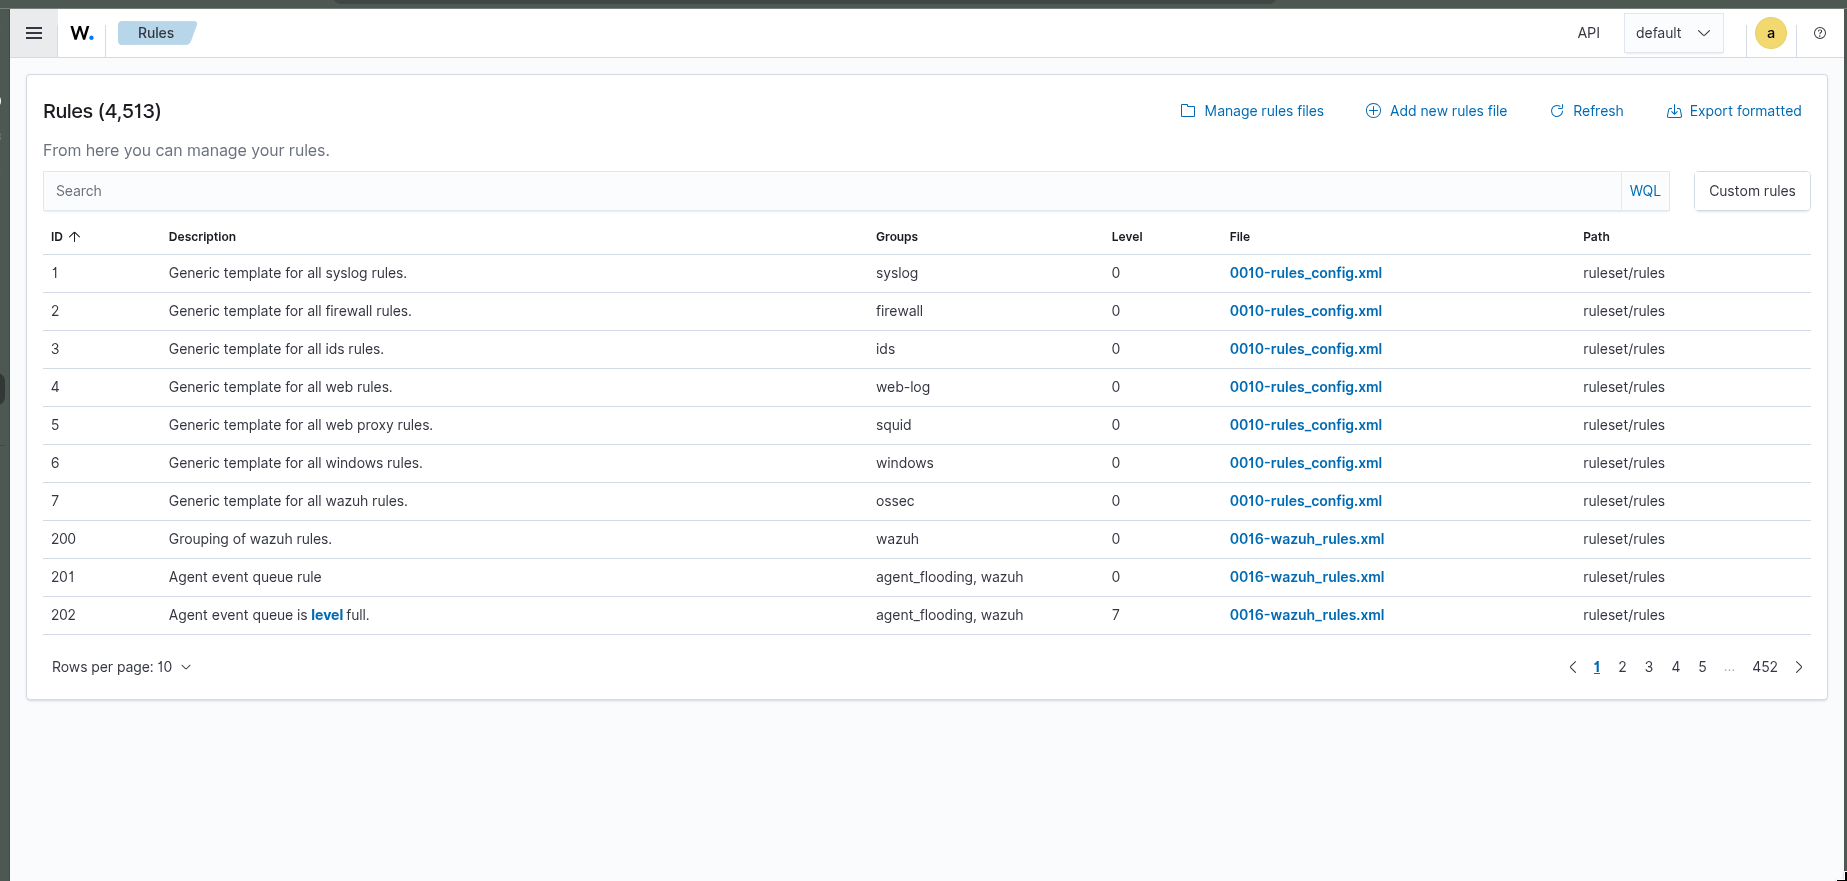
We can also find them in Server Management > Rules
SEEING THOSE ALERTS
On the Discover tab we can see and filter all the alerts.
WAZUH SERVER ITSELF
Yes, an agent 000 is installed on wazuh server itself. A SIEM is also a high profile target for attackers with access to it they can hide all thier activities
So we should also know how to monitor the SIEM itself.
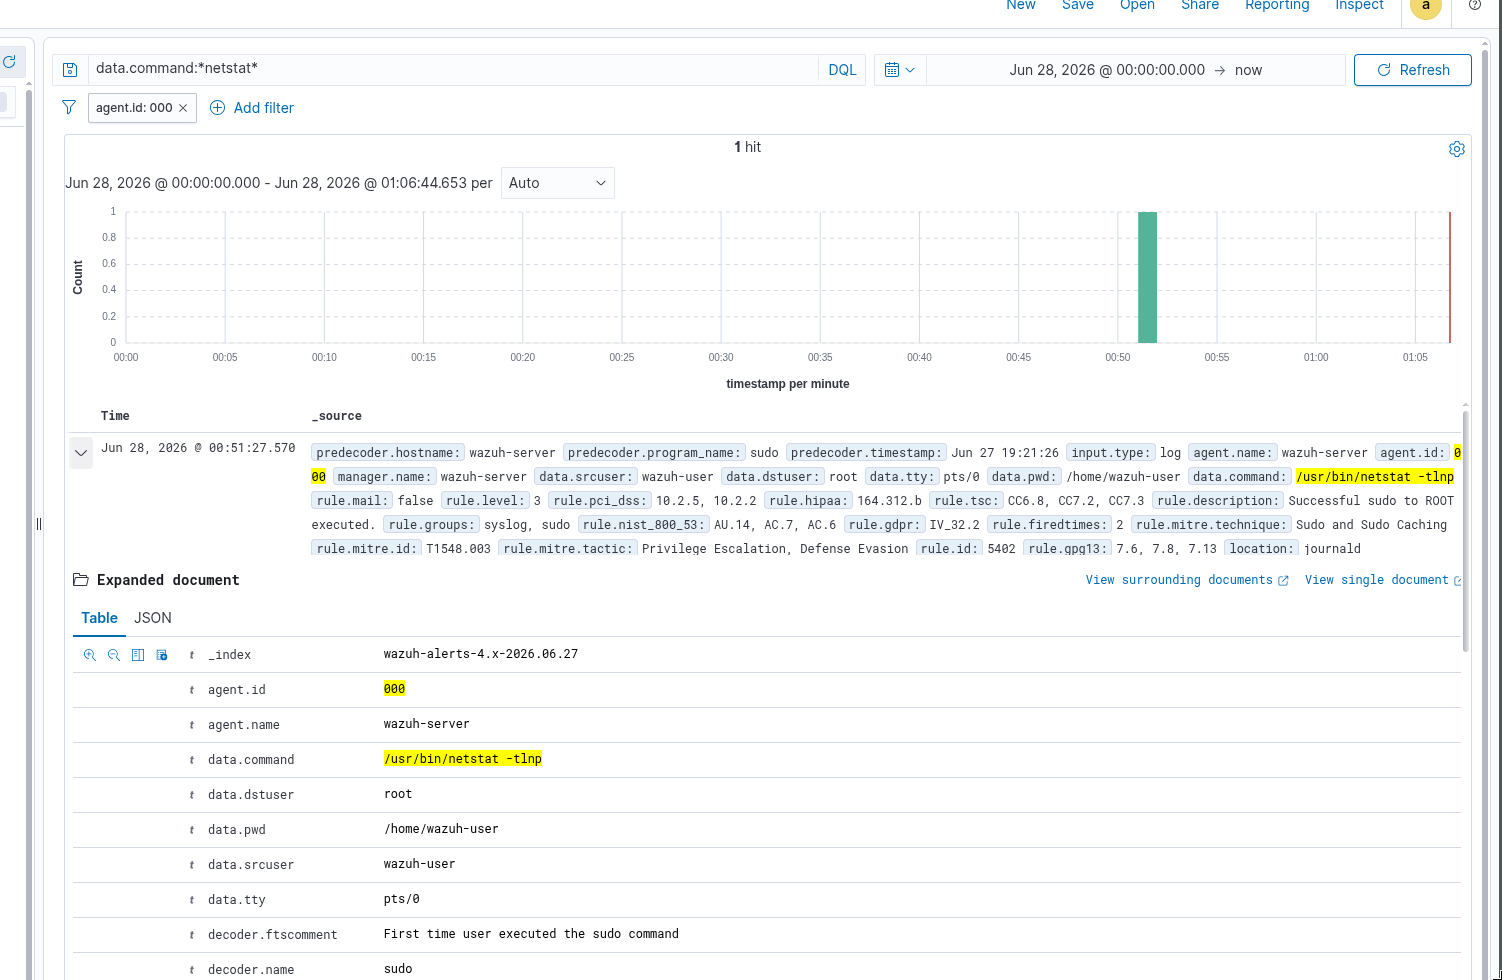
viewing active connections on wazuh server, an enumeration technique by attackers after gaining initail access.
1
[wazuh-user@wazuh-server ~]$ sudo netstat -tlnp
See the alert shows the command executed.
UBUNTU
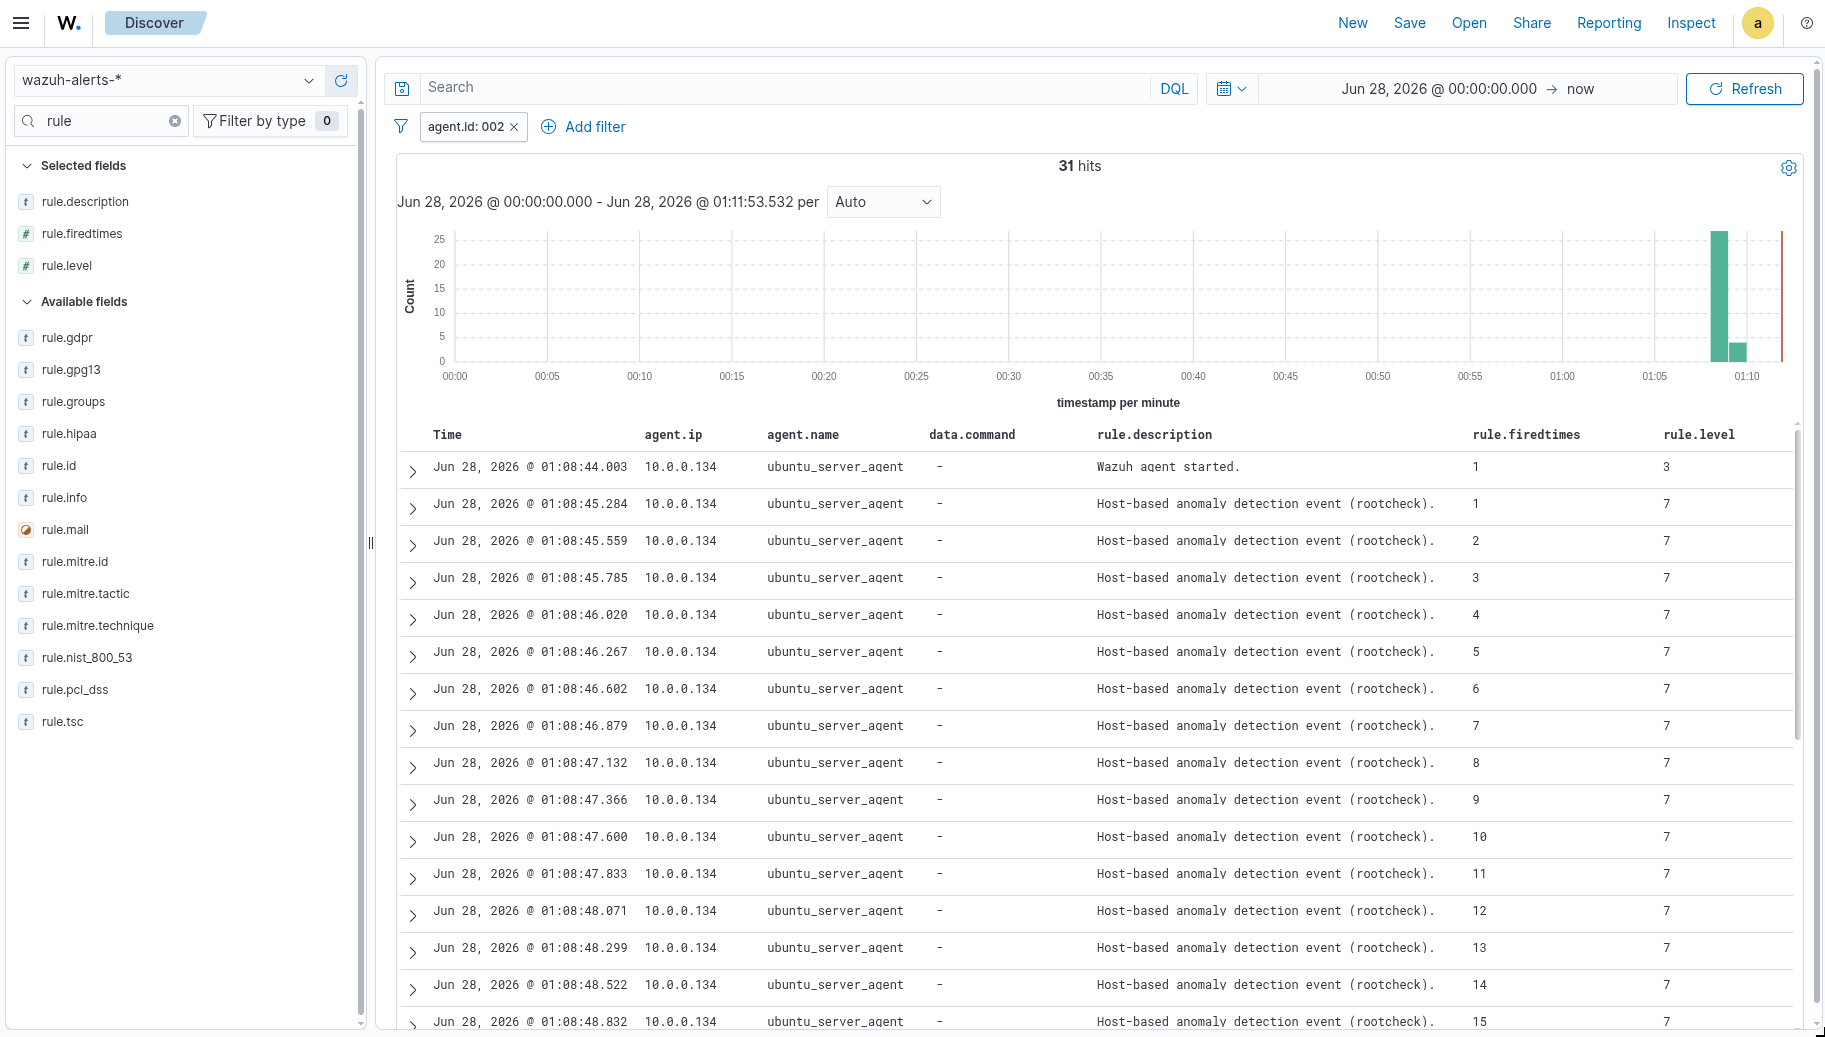
The interface is too cluttered.
We will add some required field from the sidebar, I selected some:
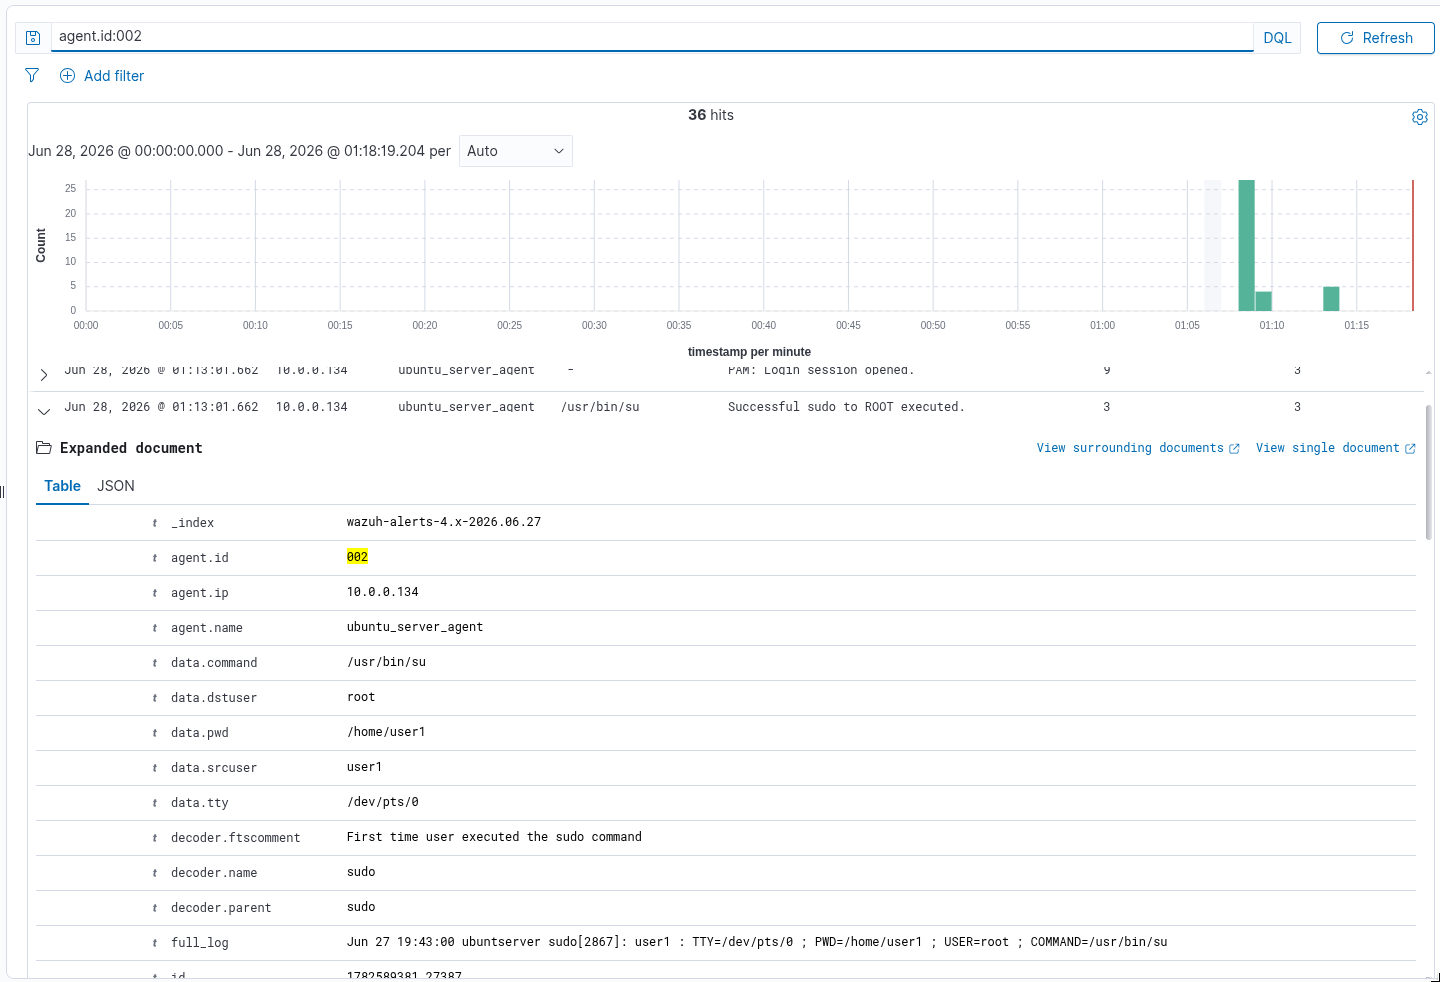
First time executing the sudo command after a login
1
user1@ubuntserver:~$ sudo su
Sort with timestamp and filter for agent 002.
1
agent.id:002
See the log showing sudo was executed.
WINDOWS
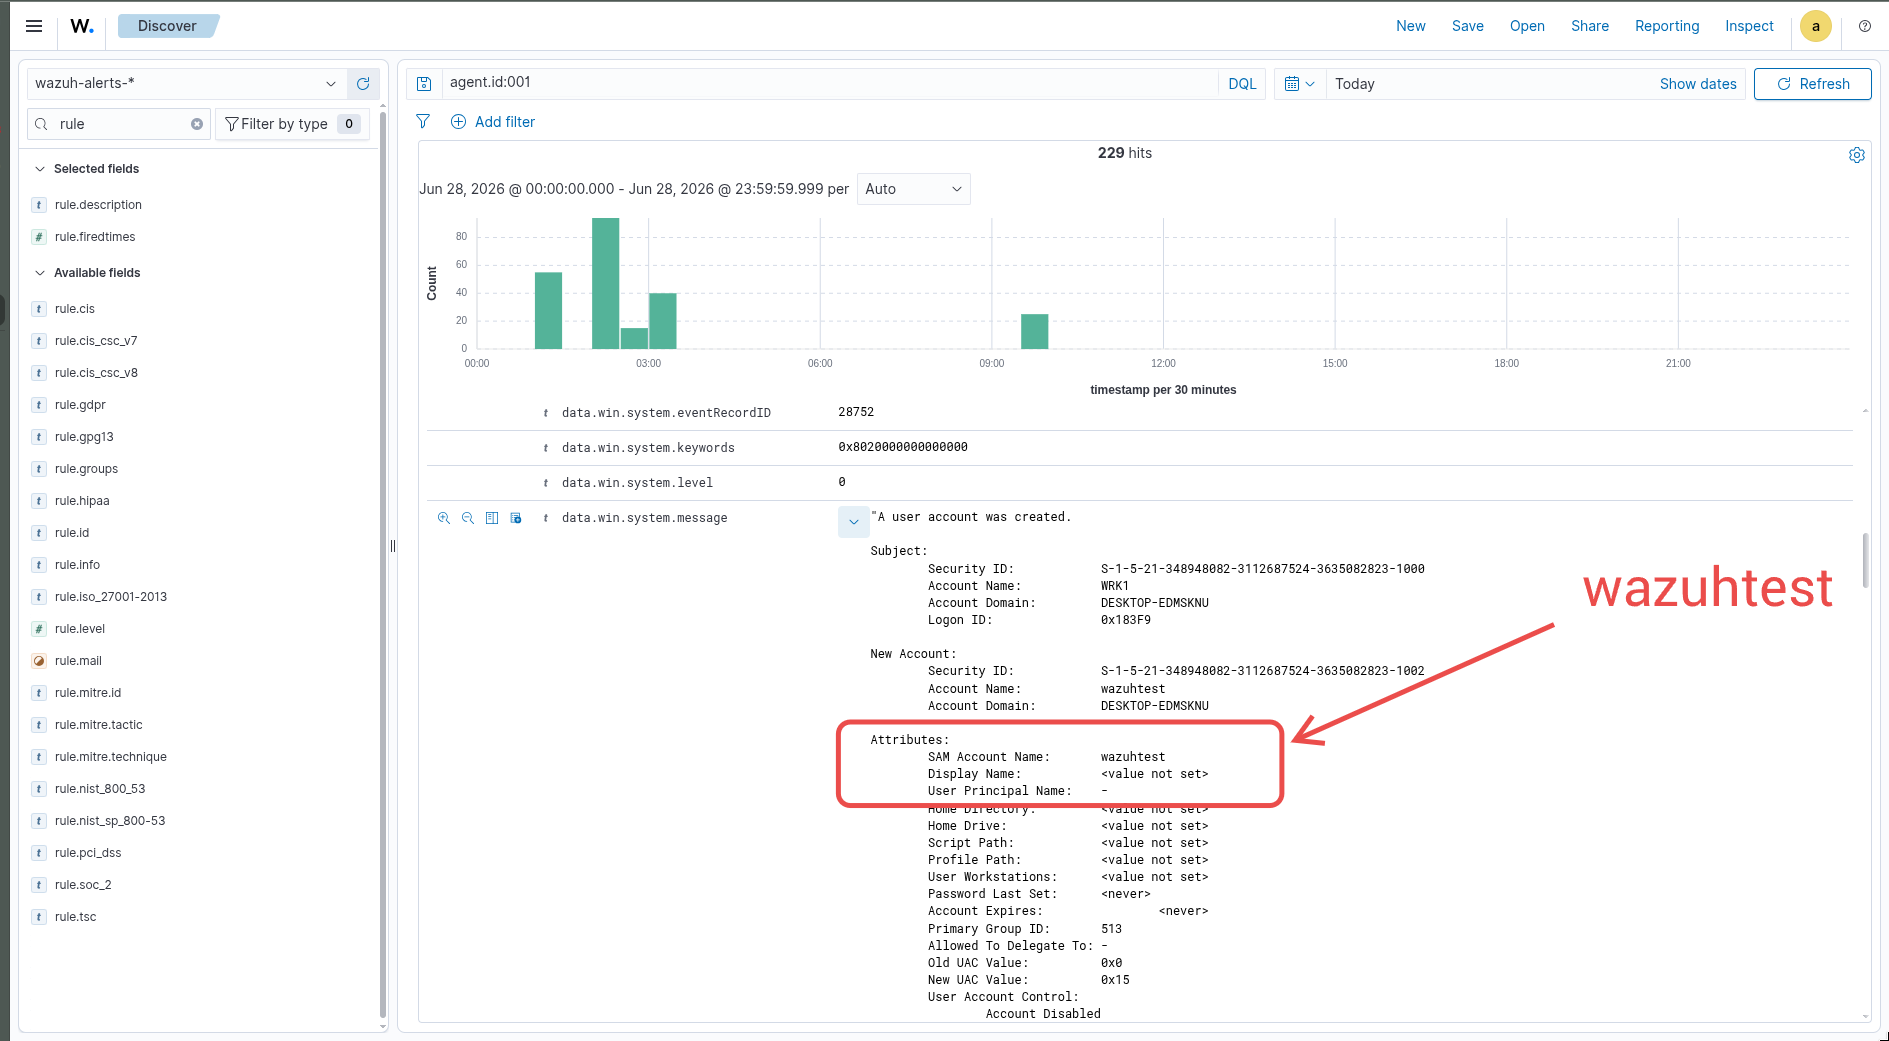
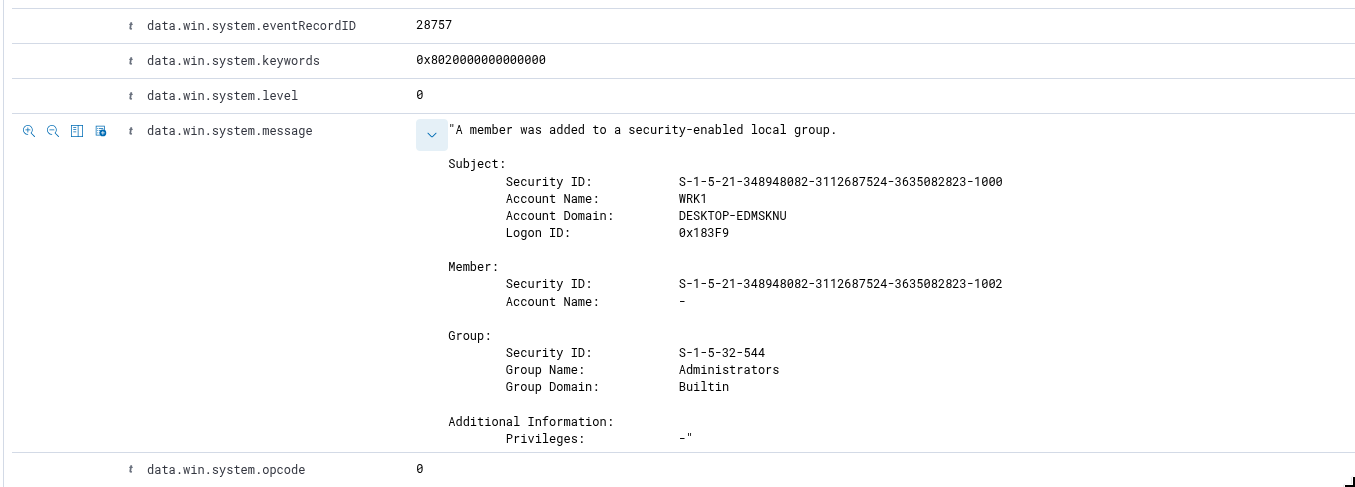
We will create a user account wazuhtest and add it to the Administrators group.
Open an administrator powershell / CMD:
1
2
net user wazuhtest P@ssw0rd123! /add
net localgroup Administrators wazuhtest /add
filter for agent 001 and set the timeline accordingly
1
agent.id:001
See the alerts showing up.

We can see that wazuhtest user was created
Alert for adding the wazuhtest user to the administrator group.
DEPLOYING WAZUH AGENT ON SURICATA
Check the Opnsense Documentation here.
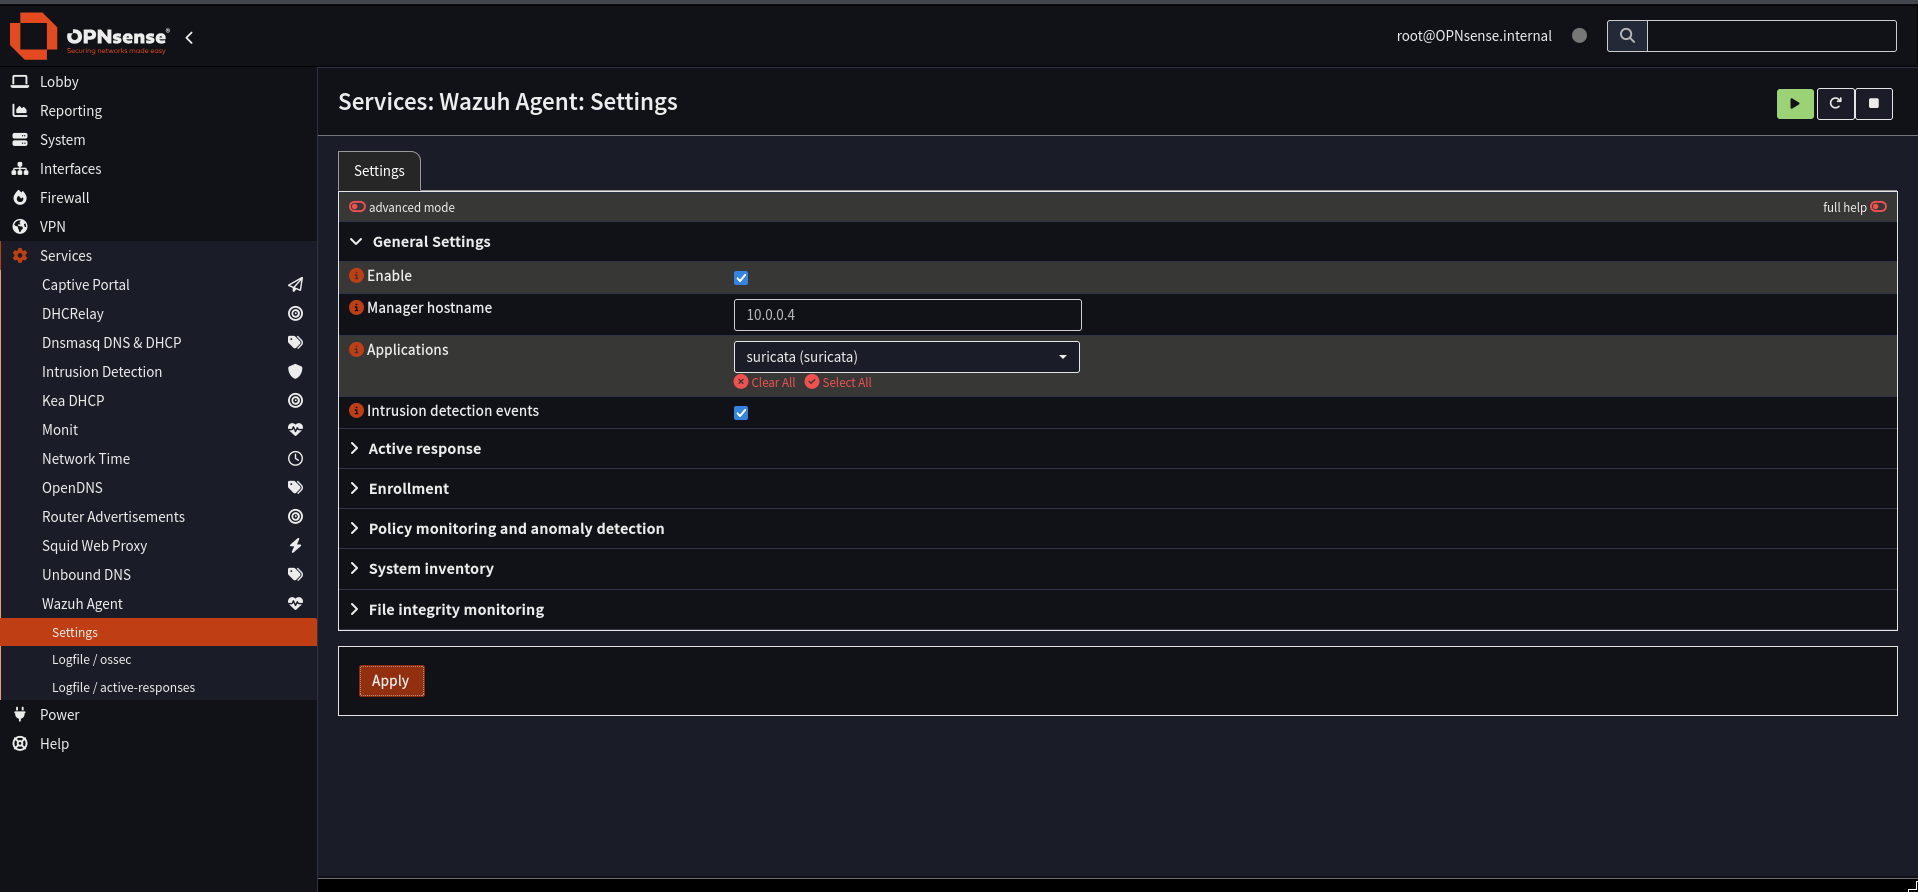
We need to install the plugin os-wazuh-agent to Opnsense.
Find the Wazuh service and point the agent to our wazuh server (10.0.0.4). And atleast select suricata from all the options.
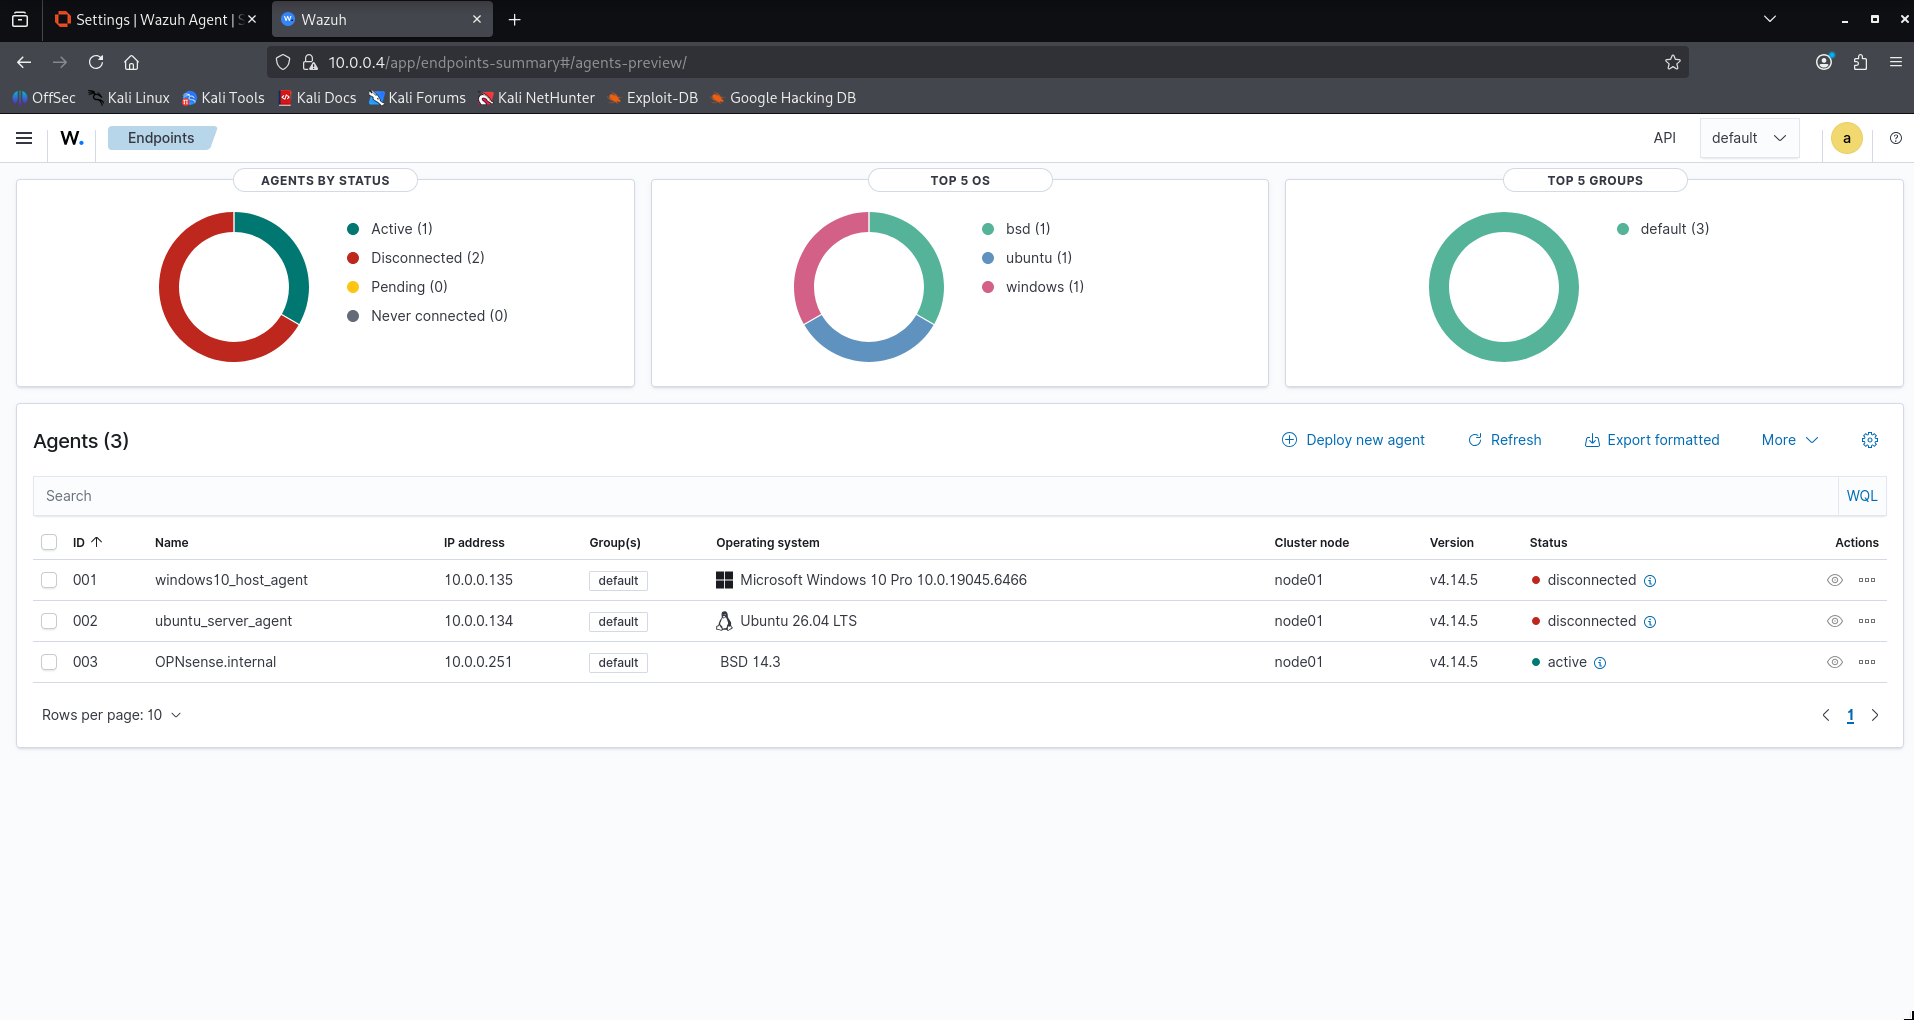
See it in wazuh. ( For no performance issues, I have disabled the other two machines for now )
TESTING
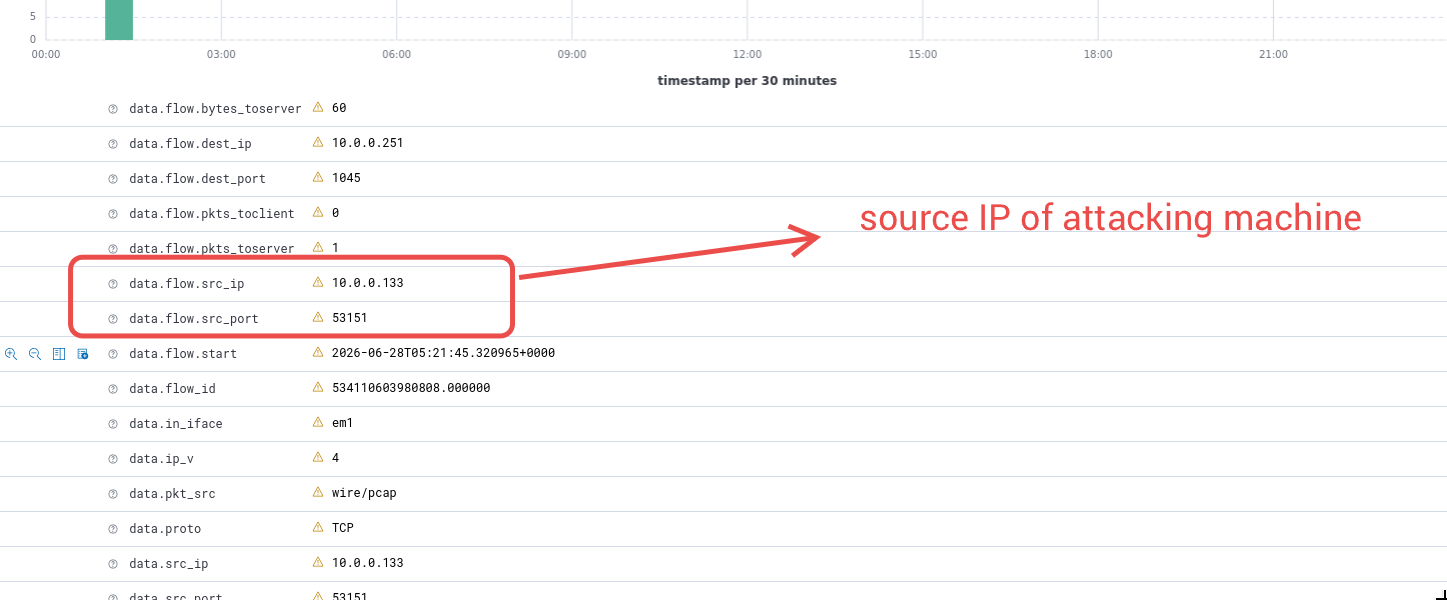
In the first post of these series, I made a very trivial suricata rule to detect SYN port scan. I will use the same for testing here.
From the kali machine:
1
sudo nmap -sS 10.0.0.251 -Pn --top-ports 500
See, Opnsense Sending IDS events to wazuh server.
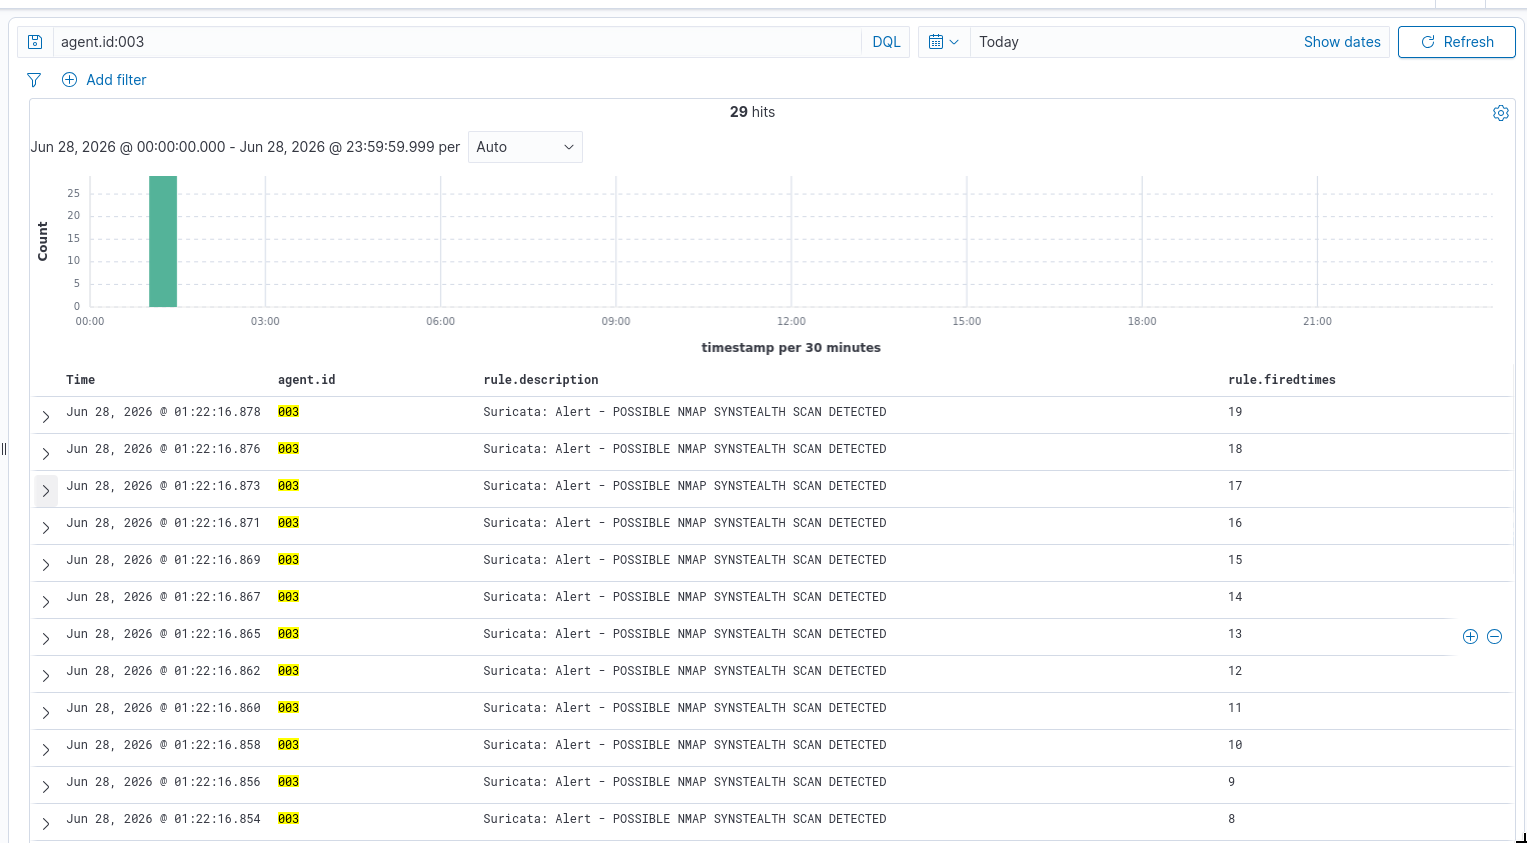
Inspect the alerts:
CONCLUSION
With this the fourth installment of “Enterprise cybersecurity and networking lab”
In next lab, I will add various threat intel tools to the SIEM. So they can aid analysts in the investigations.